I suppose a girl does when it comes in a cake like this… it is rich, moist and a little bit naughty – nah, I’m kidding, its rum essence 🙂
Rum essence really kicks up the whipped cream layer of this cake – it does add extra flavour and matches really well with the orange and chocolate cakes throughout this cake – YUM!
Now the frosting for this cake, please use all of it otherwise you will end up like me – I KID YOU NOT but I did manage to eat AT LEAST 1 cup of frosting – oh yeah, it was so pure, sweet and chocolate-y…

Without further ado ladies and gents, I give YOU (yep lucky you) this recipe for RUM LAYER CAKE! Wait no, there is further ado – A little warning that the cakes my cooking partner and I made were a little well, um cracked so after splitting and layering we managed but the cake was almost about the fall and crack and splosh down… BUT I will make sure you won’t have any disasters (and ours looked nice inside!) AND teach you how to make chocolate leaves 😀
Tips And Tricks:
- Be warned that these cakes do not rise that much at all! I recommend if you want a nice, easy to split cake that make double the recipe of the batter as to get 2 higher cakes
- If you double the cake recipe, then increase the whipped cream recipe to 1/2 more than the original because there is a huge amount of whipped cream per layer – the gelatine can also be left out as one of my classmates showed me (awesome!)
- If you double the recipe, also increase the frosting by 1/2 more than the original just so you don’t run low and can generously lick your bowl afterwards – our rosettes were a little difficult to manage because we had a lack of frosting!
- When you make the frosting, GO VERY SLOW – I CANNOT STRESS THIS ENOUGH – When it says add softened butter, tsp at a time – DO IT! Otherwise your frosting will become to separate and become grainy with no reversal strategy!
- When you frost the cake make sure that you hold the cake on your palm and run the spatula around it so you can invert the cake with both hands on top and bottom when you roll the sides in the crushed walnuts (YUM) – my partner and I took the chickens way out and just frosted the sides without holding – boy did we pay when it came to the rolling 😛
- When you place a layer of cake on top of whipped cream, slightly screw it or turn it so it jams on well – it makes the cake easier to roll and less likely to fall apart in layers
- There is an easier cake method if you are not into separating eggs – since our exams were on when we started making this cake, we baked at the same temperatures and for same time but simply: Creamed butter and all of the sugar (3/4 cup + 1/4 cup); Beat in eggs, ring, essences and juice; Folded in sifted baking powder, soda and flour and then continue with original recipe 🙂
NOW no further ado, here is the brilliant recipe which every year 10 looks forward to…
Rum Layer Cake
Source: School Recipes
Serves: 12-16 – I am giving the recipe we made originally not double or 1/2 more of anything
Ingredients
Cakes
- 2 cups
plain flour - 2 tsp
baking powder - 1/4 tsp
baking soda - 125g
softened butter - 3/4 cup caster
sugar + 1/4 cup extra separate - 1 tsp orange
rind – zested - 1/2 cup
fresh orange juice - 2 tsp rum
essence - 1/4
(increased to 1/2) tsp vanilla essence - 90g
melted 60% chocolate
Whipped
Cream Filling
- 2 tsp
gelatine - 2 tbs
cold water - 2 cups
thickened cream - 1/2 cup
icing sugar (we used icing mixture which has cornflour added and no lumps) - 1 tsp rum
essence
Chocolate
Frosting
- 125g
melted 60% chocolate - 1 cup
icing sugar - 2 tbs hot
water - 2 eggs
- 6 tbs
(120g) butter, softened
Extras
- 1 cup
roughly chopped/crushed walnuts (but nowhere near crumbs)
Method
Cakes
- Preheat oven to 180 degrees C. Grease and line two 20cm springform tins with baking paper.
- Separate egg yolks and whites.
- Cream butter and sugar with orange rind until light and fluffy. Beat in egg yolks one at a time, beating well after each addition.
- Combine orange juice with essences and add alternately to butter mixture with sifted dry ingredients. Mix well.
- Beat egg whites until soft peaks form and then gradually add remaining 1/4 cup sugar while beating until stiff peaks form.
- Fold egg white into creamed mixture.
- Divide mixture in half and add melted chocolate to one portion and mix carefully.
- Pour each batter into a cake tin and bake for 20-25 minutes or until a skewer inserted comes out clean. Let cool completely before releasing from springforms and cooling completely.
Whipped
Cream
- Place gelatine in cold water, dissolve in a bain marie style and allow to cool slightly
- Beat cream with sifted icing sugar
- Gradually beat in rum essence and gelatine until cream stiff enough to hold its shape (if you overbeat the cream will curdle and separate)
- Allow to chill in fridge for 4-5 hours.
Chocolate
Frosting
- Using an electric handheld beater (a stand mixer doesn’t give enough control), gradually beat into melted chocolate the icing sugar and hot water alternately, a little at a time
- Add in 1 egg at a time
- Gradually add butter in (1 tsp at a time) and beat until light and smooth
Chocolate
Leaves
- Find non-poisonous thick and fat leaves with good shape
- Wash and dry thoroughly
- Melt chocolate
- On the back of each leaf., paint with chocolate and place on baking paper
- Let set for 15 minutes (refrigeration makes the chocolate crack more)
- Peel of the chocolate leaf of its mold very slowly and carefully
Assembly
- Cut each cool cake in half
- Place 1 cake layer on serving plate and spread with 1/3 whipped cream
- Place another cake layer on top of other flavour and spread with 1/3 cream topping
- Place other half of bottom layer cake on and spread with whipped cream
- Place on top remaining cake layer
- On a strip of baking paper, spread out walnuts in a long line of same width as cake
- Holding cake securely on palm, spread frosting all round sides of cake (not top yet) – this doesn’t have to be neat but has to be frosting all over the sides
- Invert the cake so each hand is on either top or bottom of the cake.
- Roll the cake over the walnuts so they have stuck all around the sides and place on serving platter
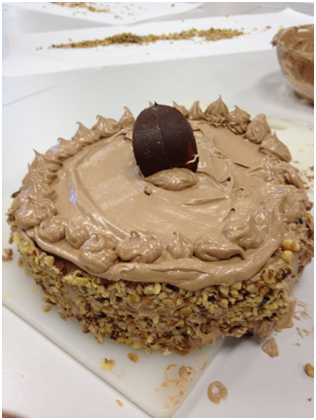
- Frost top and pipe rosettes with remaining frosting around circumference and 3 in the middle
- Decorate with chocolate leaves